
Welcome to our comprehensive guide to off-road motorcycle navigation where we explain step-by-step how to prepare and execute an amazing off-road adventure on two wheels. We will start with the basics of planning a trip, discuss the equipment you need and explain how to use it.
Table of Contents
- What is the difference between GPS tracks and routes and which one should I use?
- What is the difference between a GPX and KML file and which one should I use?
- Where do I get GPS tracks?
- How do I edit GPS tracks?
- What navigation device should I use?
- Where do I get topographic maps for my navigation device?
- How do I load topographic maps onto my navigation device?
- How do I load GPS tracks onto my device?
- How do I show GPS tracks on the map?
- How do I navigate GPS tracks on my device?
- How do I record a GPS track?
- How do I show my recorded GPS track on the map?
- How do I load a recorded GPS track onto my computer?
To get started, some terminology…
What is the difference between GPS tracks and routes and which one should I use?

A track contains a list of chronologically ordered geographical coordinates that are connected with a line and shown on a map. Common formats for GPS tracks are GPX, KML, KMZ. A useful metaphor is of seeing the coordinates as breadcrumbs that are distributed on a path that can be followed from one to the next one, until the destination is reached. Tracks are directional, but most devices do not show the direction and it can be followed in any direction. However, it is important to keep that in mind, especially when editing track files.
A route is a calculated path between coordinates. To calculate a GPS route, a trip planning software or GPS device can be used. The calculated path may be different based on the device that is being used. It is possible to convert a track into a route by using the coordinates from the track file to calculate the route. A route allows the user to use turn-by-turn navigation.
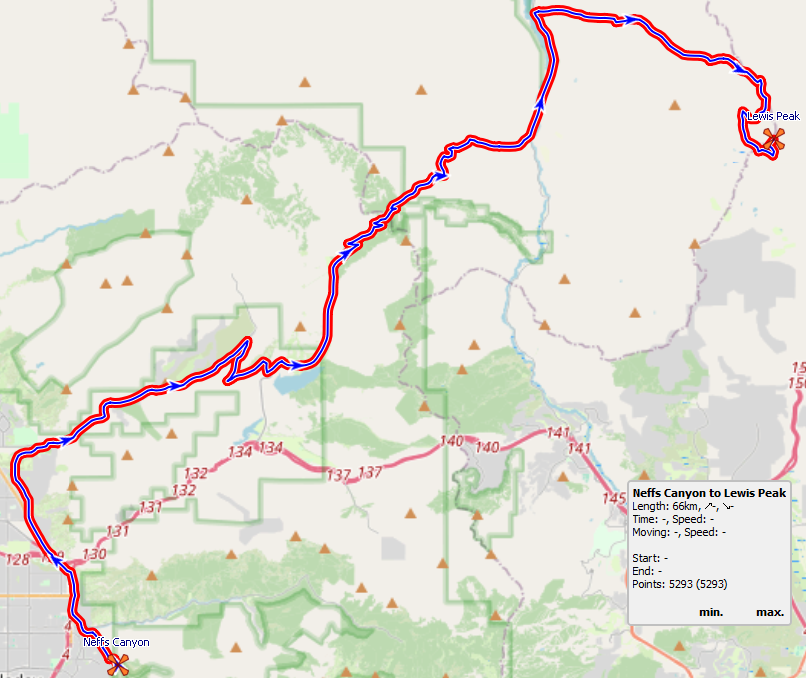
For off-road motorcycle navigation we recommend to use GPS tracks, and not routes. Routes are useful when you have a starting point and a destination and want a device or software to calculate the travel path in-between. On off-road motorcycle expeditions, we want to dictate the way of travel. Also, the trails and tracks we want to take are often unknown to the software or device calculating the route which relies on a network of paved and unpaved roads that is based on the map. It is very straightforward to navigate a track by simply following the line on a navigation device once you get used to it, and then it is the most reliable form of off-road motorcycle navigation.
What is the difference between a GPX and KML file and which one should I use?
The three letters describe the file format of the track. GPX stands for GPS Exchange Format and is the most common and universal file format used for GPS tracks and are widely supported by a variety of devices.
KML is named after Keyhole Markup Language and was developed for the use with Google Earth, which original name was Keyhole Earth Viewer and was acquired by Google in 2004. KML files are being used in Google’s geographical software tools, such as Google Maps, Google Earth and Google MyMaps to store and display geographical content.
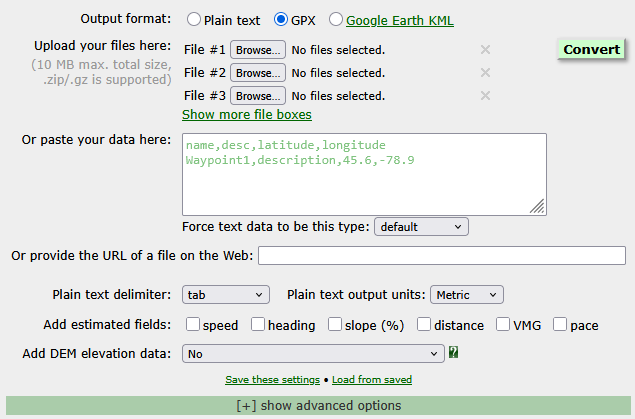
While GPX files primarily focuses on storing tracks and way points, KML files can store additionally lines, polygons and image overlays. In the end it comes down to the device you are using and which file format it supports. Because we are mainly using Garmin devices which only support GPX track files, this is mostly our format of choice. When we download a track file from Google or receive a shared KML file from a friend, we convert the KML track file with GPS Visualizer into a GPX file which takes just a few clicks.
Where do I get GPS tracks?
There are plenty of sources we can get GPS tracks from for our next off-road motorcycle navigation adventure. In this chapter I am going through the most popular options, and highlight the ones we use.
Convert Google Maps directions into a GPS track
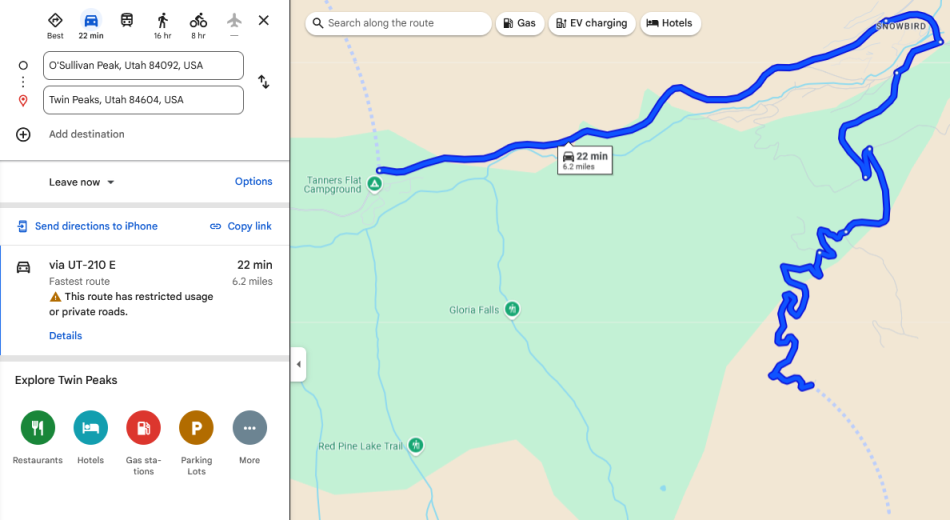
Sometimes we just want to get from A to B and want to save it as a track on our navigation device. With this simple tool we can easily convert a Google maps direction into a downloadable GPS track. All it takes is to search the direction on Google Maps, copy the link and paste it into the browser tool.
Another useful feature of Google Maps is to find off-road trails by choosing mode of “walking”. By doing this, Google avoids roads and looks for walkable routes on the map. I already found amazing single track trails with Google, but you need to be careful that you don’t end up on paths that are not allowed to enter with motorized vehicles. In most of America and Asia this is not a problem due to less strict regulations. There, the only limitation is your capability of going through tough hiking trails on a dirt- or adventure bike.

Draw your own GPS tracks with Google Earth or MyMaps
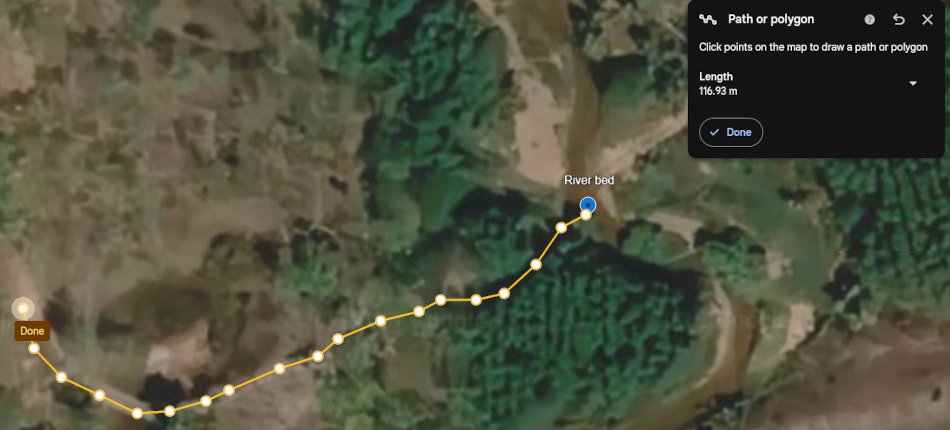
Can’t find off-road tracks in your area or want to do your own research? Google’s toolkit with Google Earth and MyMaps offers a great way to explore new trails in any area by viewing satellite imagery. This is usually our go-to approach to do map research when we want to extend trails in one of our favorite areas or need to find alternative trails when nature decides to blocks passage on some trails. We wrote another entire article about Google Earth and MyMaps and describe in detail how to use it to explore and create GPS tracks for off-road motorcycle navigation.
Record and save your own GPS tracks
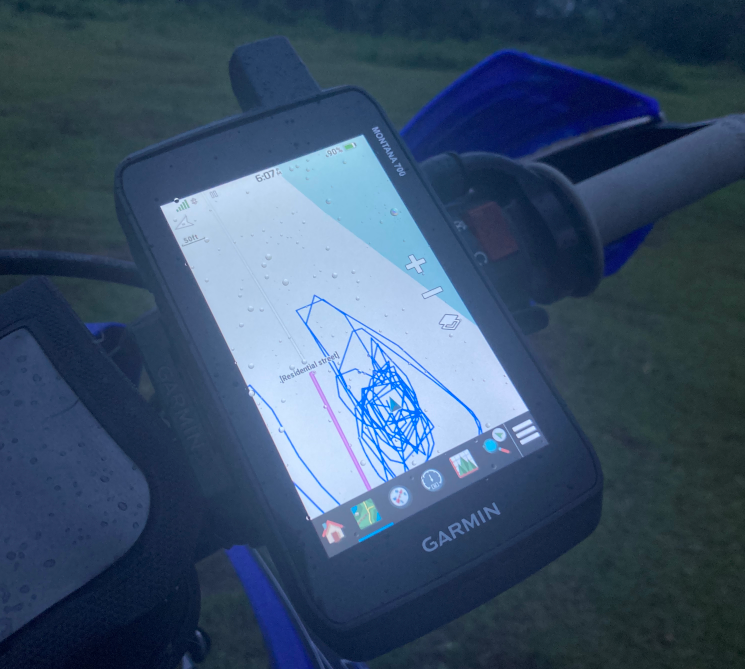
Bored of drawing lines on your computer? Load your tracks on your GPS device and go out and ride and don’t forget to hit the “record” button to bring home your very own GPS track that you can load and save in your track library. We always record every ride and update our track files from time to time with new material.
Download GPS tracks from other online sources
There are plenty of sources on the internet to get high quality GPS track material from, paid and free. Just be aware that it requires a lot of effort, time and money to scout, create and maintain tracks for off-road motorcycle navigation, so please consider supporting the people and organizations that make this possible. Most sites that offer free track material accept donations to keep up their amazing service.
Below are some sources that I have found or used in the past in different regions.
North America
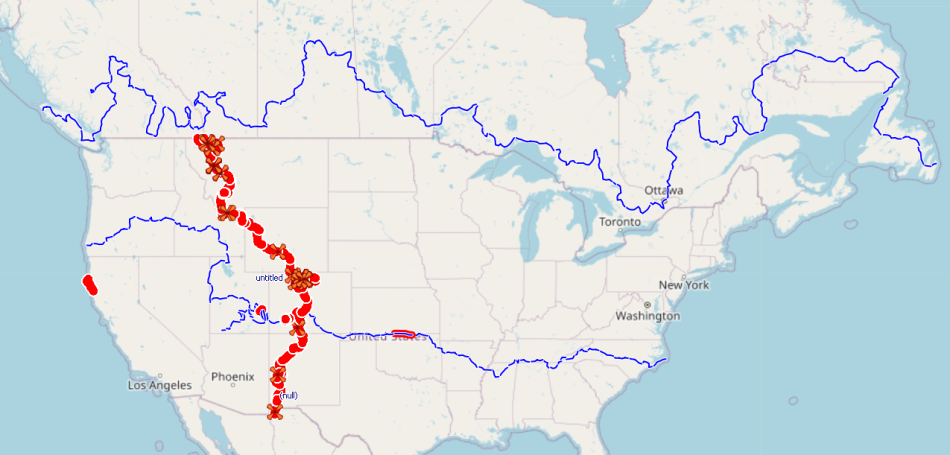
OneManTrail (OMT) – Incredible collection of GPS tracks all over North America, including the famous Trans America Trail (TAT) which is a coast to coast ride with 60 sections and over 6,000 of awesome off-road adventure, and a 9,800 miles ride through Canada called the Trans Canada Atlantic Trail (TCAT). – FREE
TransAmTrail – The original Trans America Trail (TAT) – 8-30 USD per track, 100 USD for the whole set
GPS Kevin – Another version of the Trans America Trail (TAT) – 125 USD
Backcountry Discovery Routes (BRD) – An awesome collection of high quality GPS tracks all over North America. – FREE
Australia
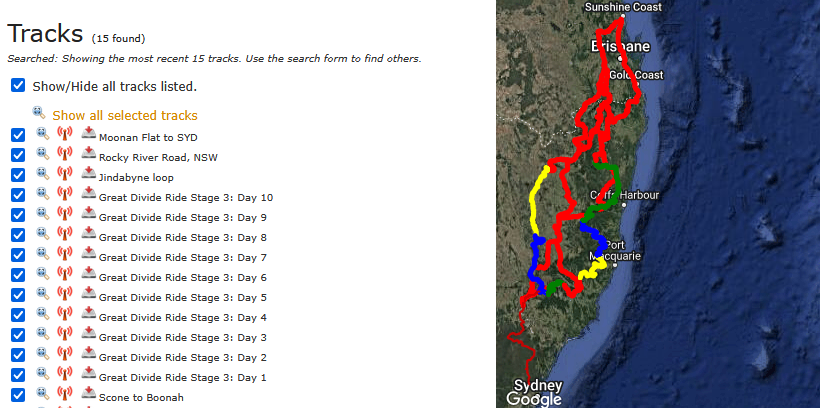
Trans Australia Trail – A Collection of off-road tracks for motorcycling in Australia. – FREE
Asia
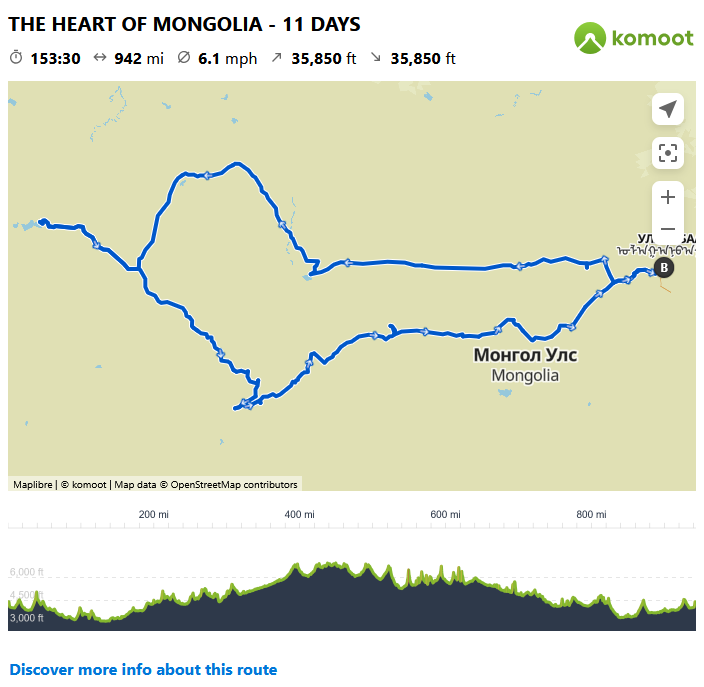
Mongolia – Cheketours published a great collection of GPS tracks for off-road motorcycling in Mongolia – FREE
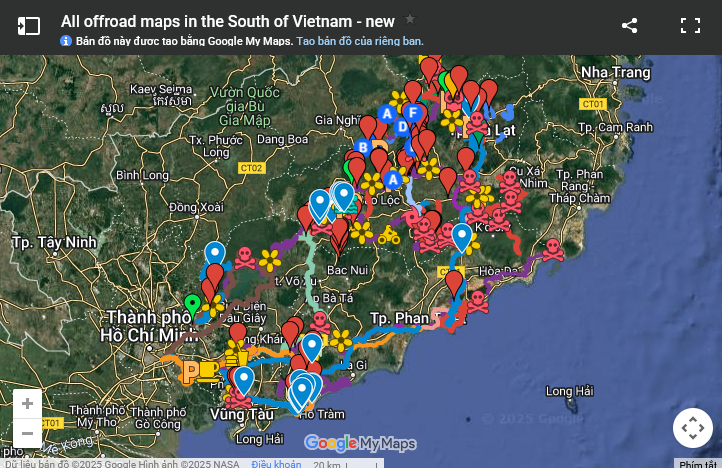
Vietnam – Tigit Motorbikes, the leading rental shop and expert guide for off-road motorcycle navigation in Vietnam published a collection of high quality and free GPS tracks downloadable from their website for both North and South of Vietnam for all riding levels. – FREE
Europe
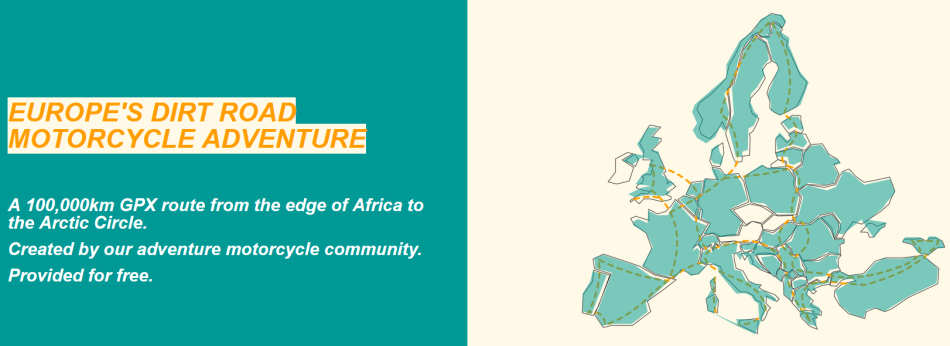
Trans Euro Trail (TET) – A web of well maintained and regularly updated GPS tracks all over Europe, built by an amazing community. – FREE
Worldwide
ADV Tracks – Global platform with thousands of off-road tracks shared by community members. A great resource to explore new off-road motorcycle trails. – FREE
Wikiloc – Global outdoor navigation platform. Plenty of off-road motorcycle tracks available, many with pictures added so you can get a better idea of the area. – FREE

Alltrails – Another great source for hiking or motorcycle off-road GPS tracks from other community members. – FREE

Komoot – Global platform for sharing hiking, cycling or running routes. Includes a route planner as well. Another fantastic resource to discover off-road trails in any area. – FREE

How do I edit GPS tracks?
Now that we have a collection of GPS tracks from various sources as explained above, it is time to find a suitable way to manage and maintain these tracks. We can either simply store the GPX files in a file directory on our computer, but there is great software available that are more suitable for this task – this software is called Geographical Information System, or short GIS.
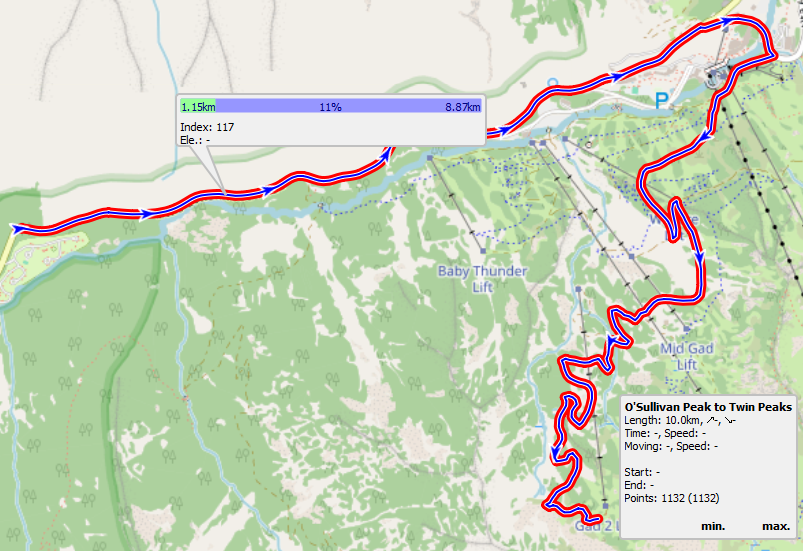
Which GIS you choose comes down to your preference, one of the most popular GIS is Garmin Basecamp. We wrote an article where we presented some great alternatives to Basecamp and explain what we like and dislike about them. For most of the track editing and management we are using QMapShack, one of the lesser known GIS but in our opinion very suitable for this purpose.
Basic features you want to have when using any GIS (demonstrated in QMapShack):
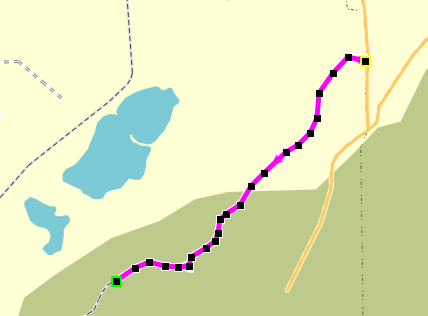
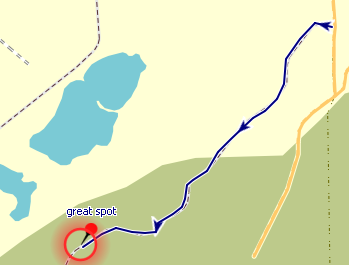
Draw a track line
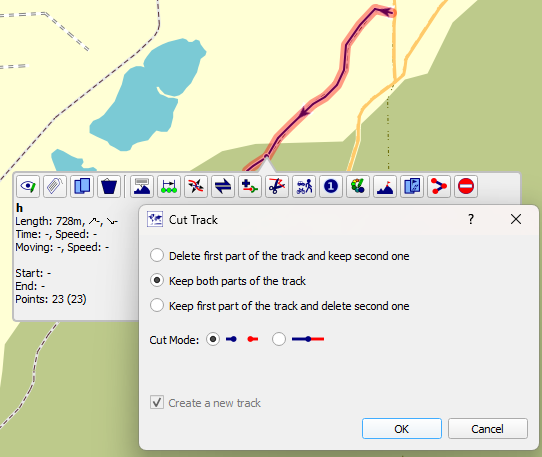
Split a track
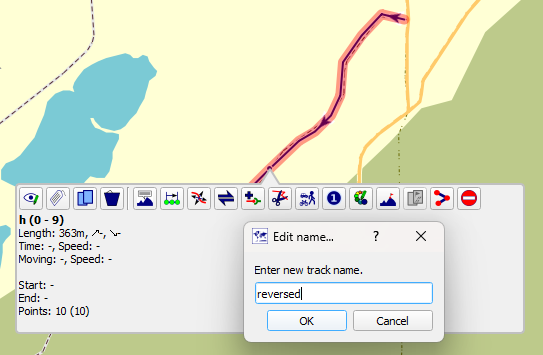
Reverse direction of track
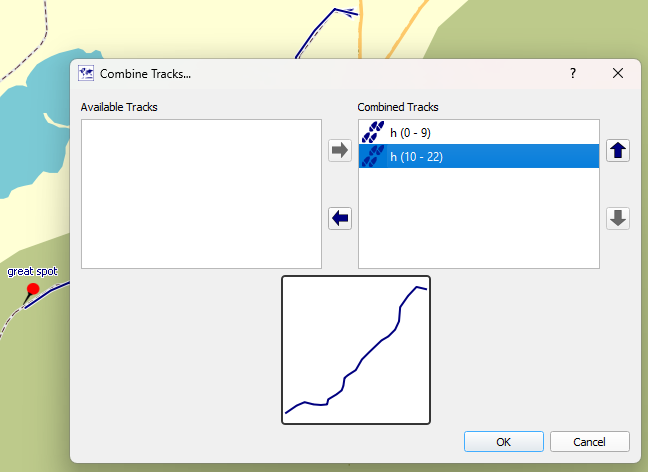
Merge tracks
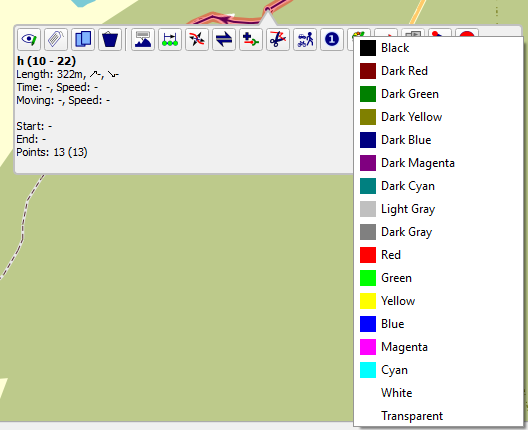
Color format track
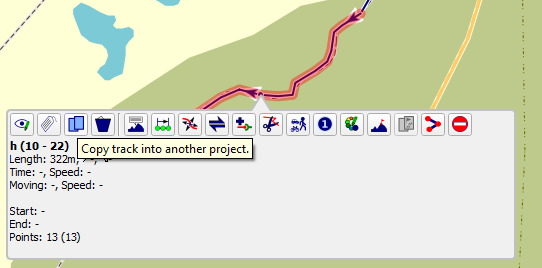
Copy track
Mark a way point
Move a way point
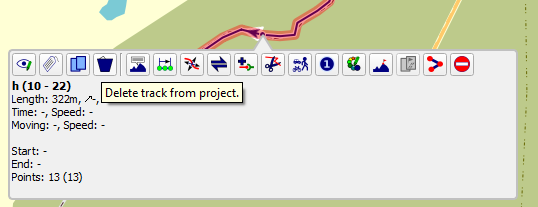
Delete track
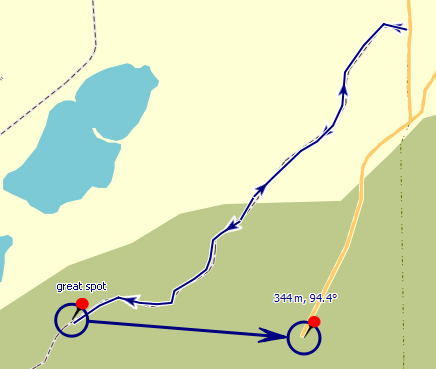
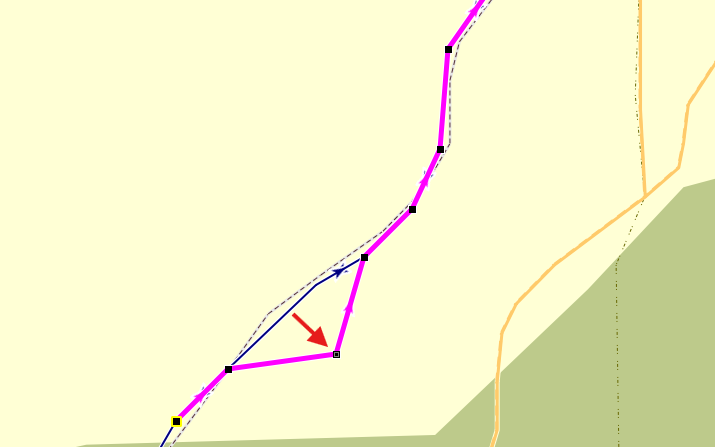
Move track point
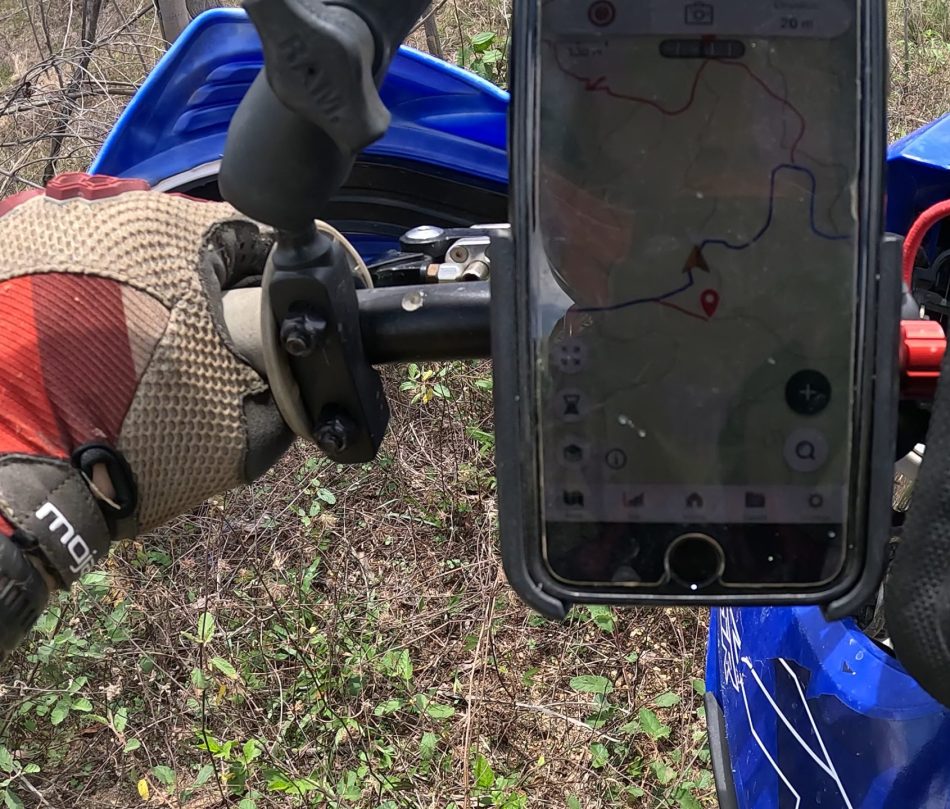
What navigation device should I use?
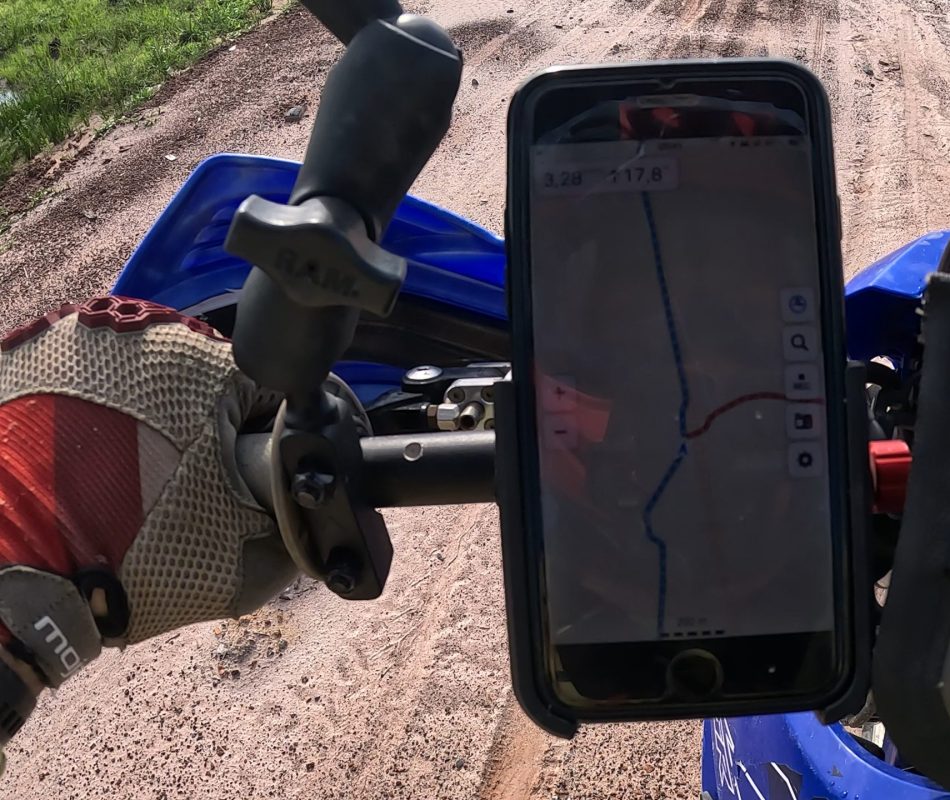
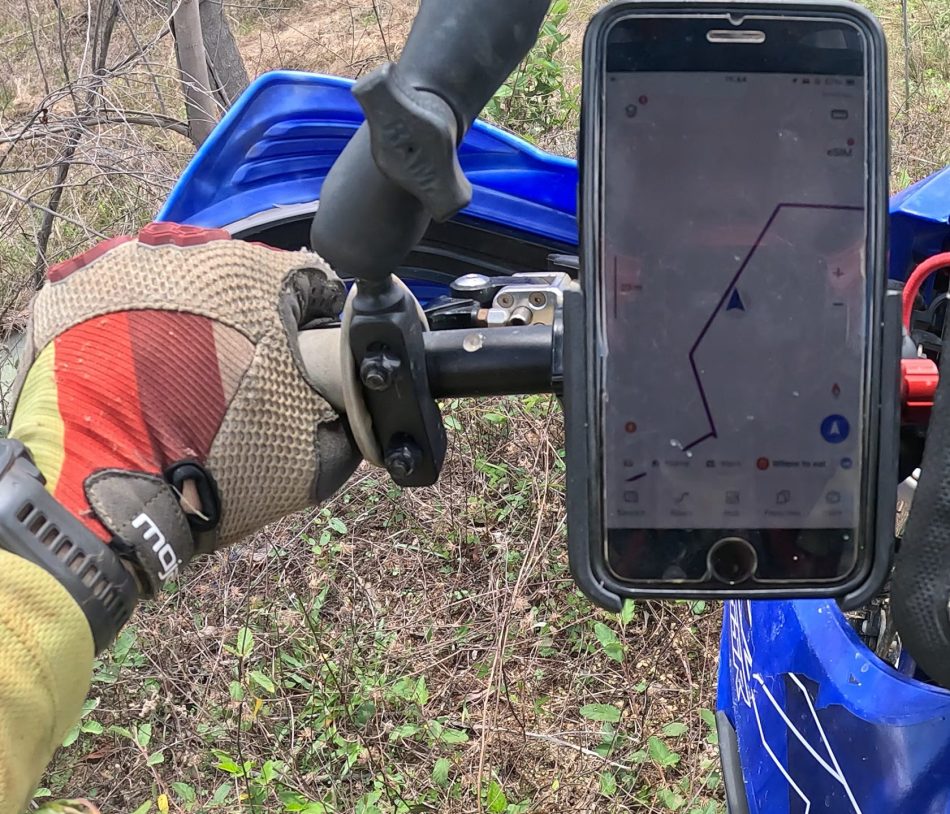
When choosing a suitable navigation device we have quite some options. We can either repurpose an old smartphone (Like we did in this article and wrote about our experience) and use one of the many apps available, or we can use a dedicated GPS navigation device (In this article we listed four reasons why a dedicated device might be a good idea).
In this paragraph we will go over some options of dedicated navigation devices, with varying price ranges. If you want to use a smartphone and looking for the right app, skip to the next paragraph where we compare three popular apps to use for off-road navigation.
Garmin eTrex 22x/32x
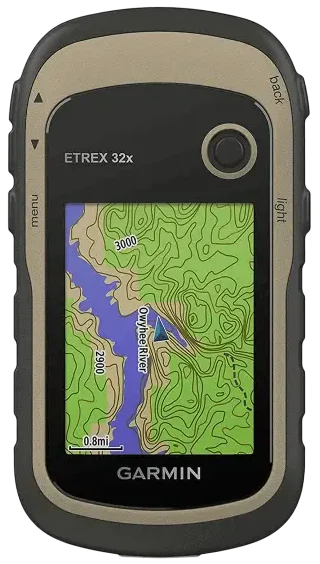
- 200 – 300 USD
- Lightweight (only 142grams or 5oz) and space saving
- Bright transflective display that works outdoors under bright sunlight
- Operated with buttons
- Runs on 2 AA batteries
- 25 hours battery life
- Great for hiking or racing
Garmin Montana 700/700i/750i/710/710i/760i
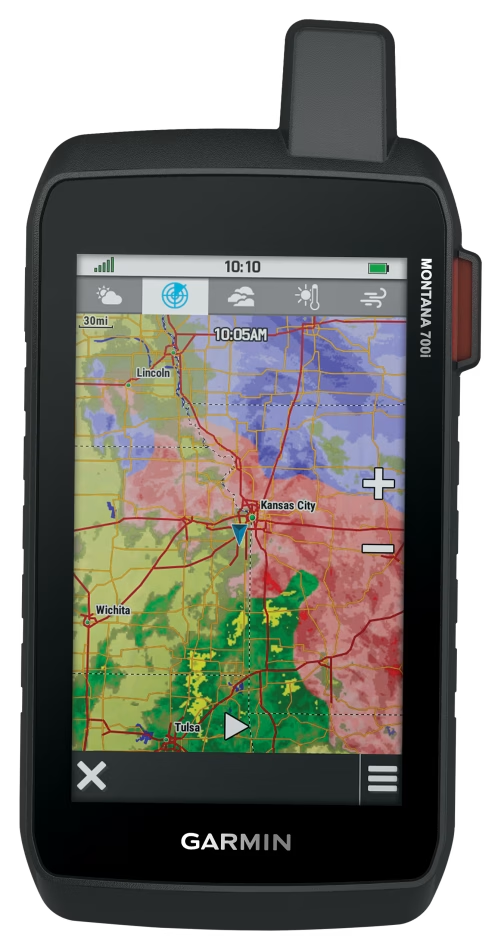
- 600 – 900 USD
- Heavy with almost 400grams or 14oz and bulky
- Bright transflective display that works outdoors under bright sunlight
- Comes with all bells and whistles
- Big, glove-friendly 5 inch touchscreen
- 18 hours battery life on the 700 and 24 hours on the 710
- Ultra-rugged design of device and mount
- Overall great device for adventure riders that don’t bother with the size and weight
- Our pick!
Garmin Zumo XT/XT2
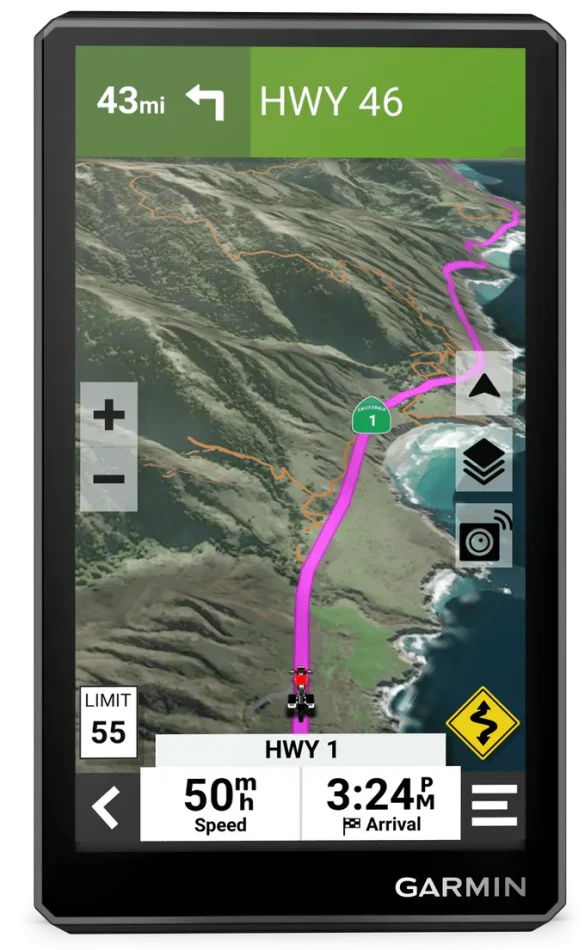
- 600 USD
- Huge, glove-friendly 5.5 inch touchscreen
- Slim form factor and with 340 grams slightly lighter than the Montana
- Bright transflective display that works outdoors under bright sunlight
- 6 hours battery life
- Overall less rugged device and mount compared to the other two
- Less off-road and more road oriented, suitable for dual-sport riders
Which smartphone app should I choose for off-road navigation?
You decided not to use a dedicated GPS navigation device, and use a smartphone instead? In this section we present you three popular smartphone apps that run on both iOS and Android devices, support synchronizations between devices when logged in and support both KML and GPX track files.
I tested Guru Maps, MAPS.ME and Gaia GPS. Below, I listed both pro’s and con’s and wrote what I liked and disliked about each of them.
To spoil the result: If you are not willing to spend on a subscription MAPS.ME might be your best (and only) option, because Guru Maps only allows 15 tracks in the free version (including recorded tracks) and Gaia GPS basically does not work when you are out of signal without an internet connection. If you are willing to spend at least 27 EUR per year or a little over 2 EUR per month for an app subscription we think Guru Maps is the best choice among the three because it does everything exceptionally well.
Guru Maps
PRO
- Track recording function
- Customizable buttons on main page
- Zoom buttons on the left
- Show track direction on map
- No ads
- Can format tracks with color coding depending on speed/elevation, which is unique and interesting
CONTRA
- Only one map available
- Only 15 tracks in free version allowed, which makes the free version quite unusable, especially because recording a new track also counts towards this limit
- We wished that there were darker track colors to choose from. The ones that are available don’t have the highest contrast and are not easy to see, especially on phone screens on a sunny day
–> 27 EUR for yearly subscription
–> Requires subscription to use with more than 15 tracks, best paid option with very reasonable price
MAPS.ME
PRO
- Track recording function
CONTRA
- Auto-zoom annoying
- Advertising
- Export only to KML
- Only one topo map available
- Zoom buttons on right side
–> 45 EUR for yearly subscription
–> does the basics fine, has some downsides and but the pro subscription is overpriced for what you are getting
Gaia GPS

PRO
- Track recording function
- Easy to to take geotagged pictures and sync with the recorded track
- Variety of topo maps to choose from
- No ads
CONTRA
- Following a track when have a data connection works fine, when you’re out of signal it stops working and starts lagging which makes this app unusable for off-road navigation. Haven’t tested it with a subscription, but at least the free version failed my test big time!
- No zoom buttons on screen
–> 60 EUR for yearly subscription
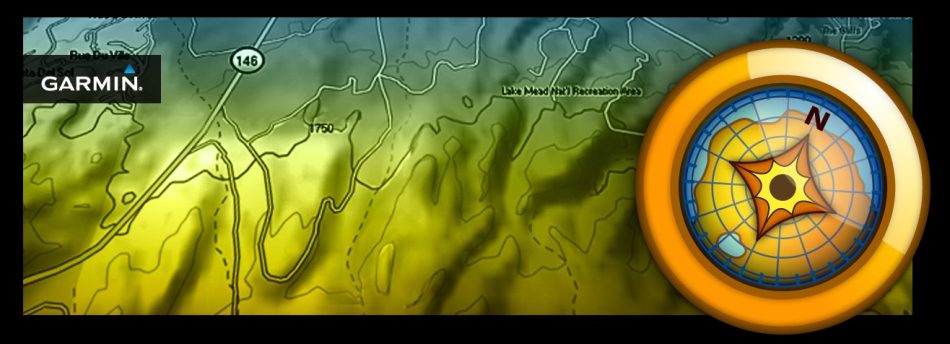
Where do I get topographic maps for my navigation device?
If your device supports the installation of custom maps, like a Garmin GPS device, then you can choose your own topographic map. For off-road navigation there are a few things we should consider when deciding which map to use (See our article where we explain in details what makes a good map for off-road navigation and where to get free maps).
- The map should be simple and have a focus on trails off the road
- It should ensure good visibility by using colors with low contrast and light color tones to make it easier to see the loaded GPS tracks
- Map speed is important. This goes hand in hand with the first point, since the less details and graphics need to be loaded the faster the map is going to operate
Paid map options
If you are willing to pay for your maps there are great options directly from Garmin’s Outdoor Maps. You can choose to subscribe to Outdoor Maps+ for 50 USD per year to access a wide range of updated map options, including satellite images or purchase individual maps for your area of choice, like for example this TopoActive map for North America for a one-time payment of 60 USD.
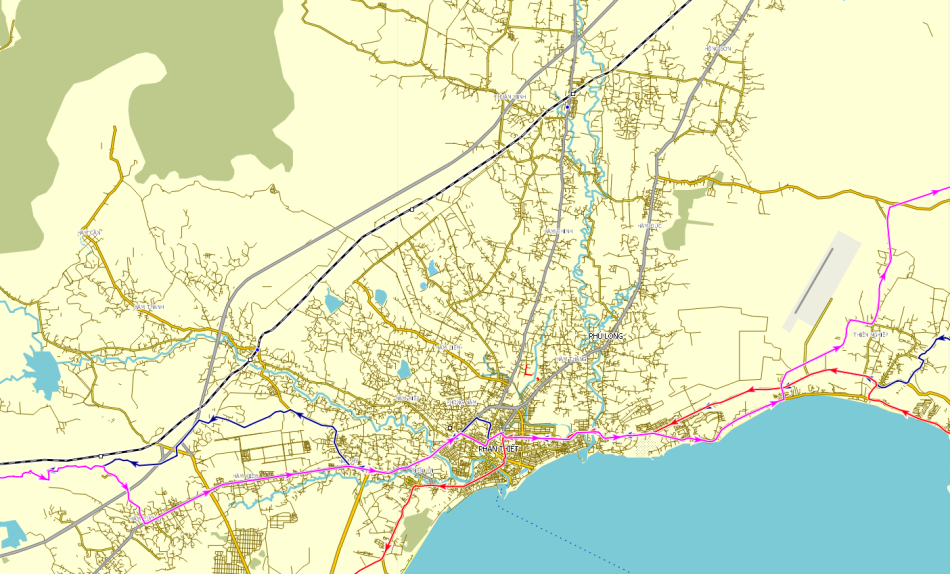
Free map options
For free options you might want to check out OpenStreetMap (abbreviated OSM), a free, open map database updated and maintained by a community of volunteers via open collaboration. There are plenty of overlay options based on OSM, and you can choose one that works best for you. To extract the map for the area where you want to ride, you can use the BBBike service to extract the map.
View our detailed instructional on how to extract a map with BBBike.
How do I load topographic maps onto my navigation device?
If you have followed the steps above, you should have received a download link from BBBike with an .img file. To load the map file to your Garmin GPS device, simply connect your device with USB to your computer and copy this file to the “Garmin” folder on the device. On most newer devices you can give your maps random names and they will show up on your device in the map manager for selection. Some older devices only support one map and it has to be named gmapsupp.img or else it will not show.
How do I load GPS tracks onto my device?
To load a GPS track file to your GPS device you need to verify which file formats your device supports. If you are using a smartphone with one of the three apps we reviewed in this article, you can either use KML or GPX files. If you are using a Garmin device, you can only use GPX files.
Load GPS tracks onto a smartphone
All you need to do is send the KML or GPX file to your smartphone, by email, messenger, cloud services, etc. Then all you need to do is select “open in other app” and select the app you want to use and it will import the track file.
Load GPS tracks onto a Garmin GPS
To load the tracks onto your Garmin, you have a few choices, either by simply connecting the device or the SD card to your computer and transferring the file directly onto the Garmin’s “GPX” subfolder, or by using a GIS application that recognizes the connected Garmin device. In this case just select “Send to device” from the app menu and select the tracks you want to load. The last option is using Bluetooth, in this case you do not need to connect your device to your computer. All you need to do is load the tracks to Garmin Explore and then synchronize the tracks by turning on bluetooth on the Garmin device. This only works on newer devices.
How do I show GPS tracks on the map?
To show your GPS tracks on your map you commonly need to access a track manager, on the Garmin you can then choose which track to show with the toggle button “Show on map”. Most smartphone apps work very similar where you can choose which tracks to show or to hide.
Some apps can store tracks in folders, allowing you to show all tracks within this folder on the map with one click. On a Garmin you will need to select each track individually, which is time-consuming especially if you want to load many tracks at the same time.
How do I navigate GPS tracks on my device?
To follow the GPS track you loaded and activated on your device, you simply need to go to your location. This is usually done by clicking the “compass” button on your screen. Then, you set the zoom level you feel comfortable with and simply ride and follow the track line. (Check out our other article where we give some tips how to use GPS tracks to navigate and improve your off-road navigation).
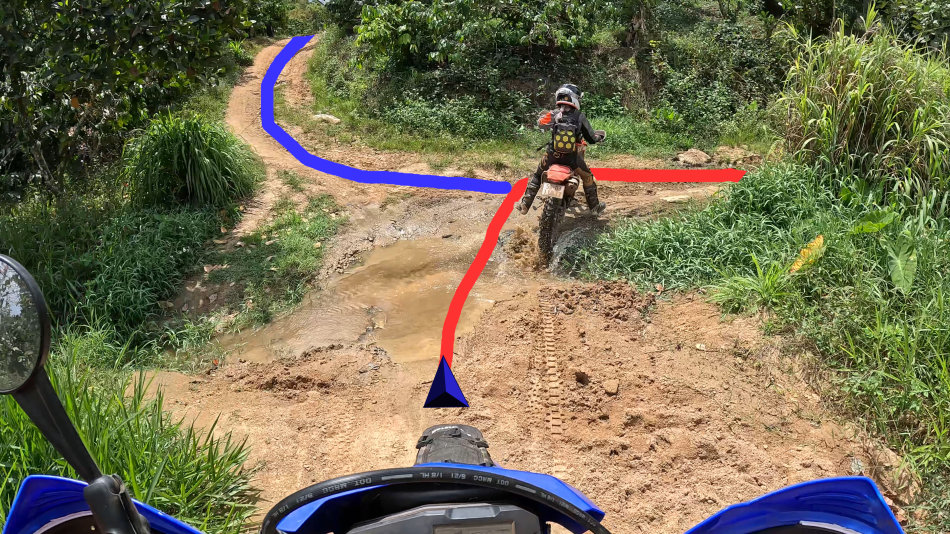
There are two common orientation modes for navigation:
- North-up – The map orientation will stay the same regardless of the direction of the GPS always pointing to the north of the map.
- Track-up – The map will rotate and align with the direction of your GPS always pointing straight. This is our preferred mode as it feels most natural and easier for orientation. Also, this utilizes the vertical screen the best and we can always see the track straight ahead.
How do I record a GPS track?
We always recommend to record your GPS track. Not only to keep a record for future travels, but also for your safety, in case you need to track back to your starting position. To record the track you can use one of the smartphone apps that we presented, your Garmin GPS or a Garmin smartwatch (Check out this article where we explain in detail how to use a Garmin smartwatch for off-road riding).
How do I show my recorded GPS track on the map?
We always like to show our currently recording GPS track on the map screen. This helps with orientation because we see which path we have traveled already. Unfortunately, this is only possible on the Garmin devices. To activate this setting, go to the menu “Recording activities”, select the currently recording track and select “Show on map”. You can choose the color of choice, make sure it is a different color than your usual track color so it is easier to differentiate the planned vs recorded track. We usually choose a light yellow or green color for this.
How do I load a recorded GPS track onto my computer?
After each ride we like to load our recorded track onto our computer, so we can review the route and update our track library. If you used a smartphone you can usually either export the track and send it to your computer or if the app has an online portal such as Gaia GPS, you can simply log into your browser and it automatically synchronizes to your account. The same goes for Garmin smartwatches, which automatically upload the recorded activities to your Garmin connect portal.
If you used a Garmin GPS you will see the tracks by connecting it to your computer, either directly in the GIS such as Basecamp or QMapShack, or by accessing the storage directly in the GPX subfolder.
9 Comments