
One of the most powerful tools when it comes to preparing and editing a track for adventure riding, is Garmin’s Basecamp. For many the software feels daunting and overwhelming, that is why I show in a few simple steps how to effectively use it to prepare for a tour.
Related: Check out our Comprehensive Guide on Off-Road Motorcycle Navigation where we cover all topics from planning to execution.
Table of Contents
- Load a GPX file in Basecamp
- Split the track
- Format tracks in different color
- Create waypoints
- Draw a new track line
- Combine tracks
- Send the tracks to your Garmin GPS device
Load a GPX file in Basecamp
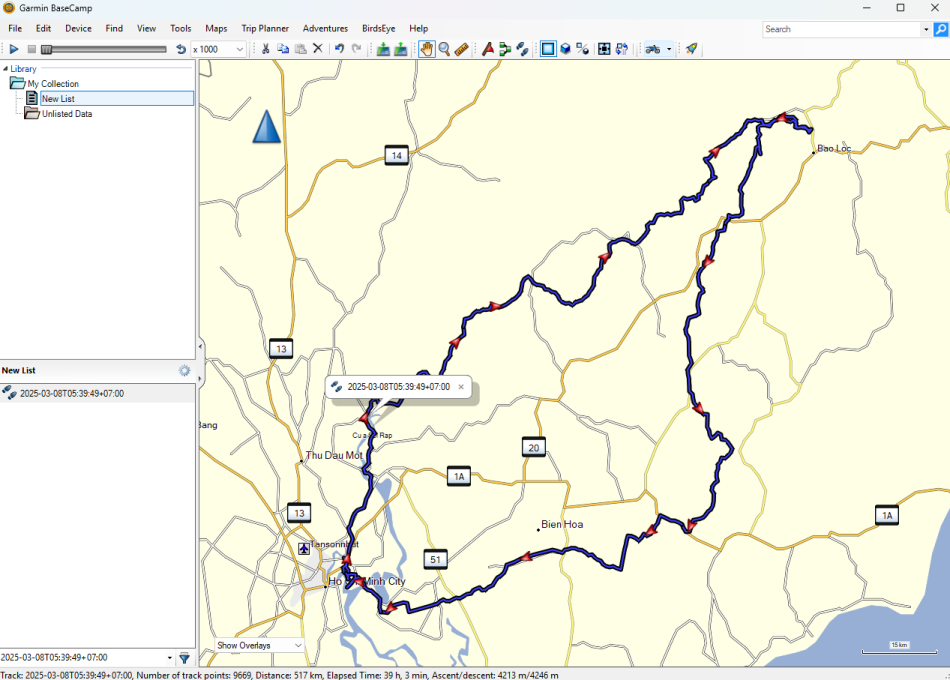
To start off, we will import a GPX (GPS Exchange Format) file into Basecamp. This could be a previously recorded track that we want to review or modify, a file a buddy shared with us, or simply a public track we found online.
To import the GPX file, we go to File > Import into ‘New List’ or press the shortcut CTRL+I, then we select the file from the drive location. It will open the track, name it ‘New List’ and show it on the map.
Split the track
To split the track into multiple sections, we can use the split function. This is useful to format sections in different colors to enhance visibility, or to cut out some parts that we do not want to keep in the middle of the track.
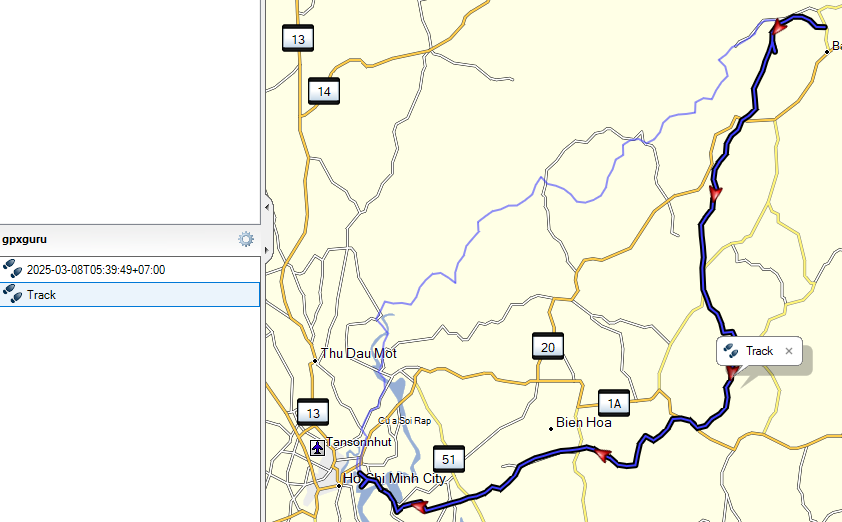
To split the track we click on the coordinate on the track file where we want to split the track. In our case we want to select the point at the hotel to separate the track into two days of riding. We right-click on the track point and select ‘Split Track Here’.

As a result we will have two tracks in our list that we can format differently and can continue to work with:
Format tracks in different color
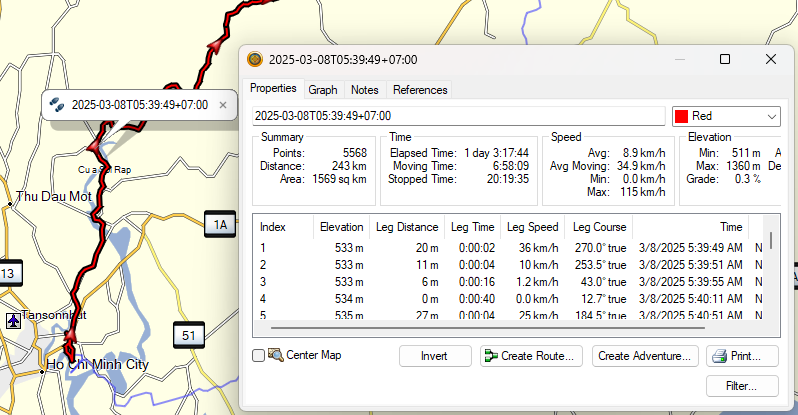
To highlight sections it is useful to format tracks in different colors. By double-clicking on the track on the left panel, the detail information of the track will open, and on the top right I can select the track color. In this case, I choose red.
Create waypoints
To create a waypoint I use the small waypoint icon in the toolbar on top of the screen. Then, I choose the location to place the waypoint and confirm with a left-click. Afterwards I can select the waypoint from my list and change the icon and give it a name.
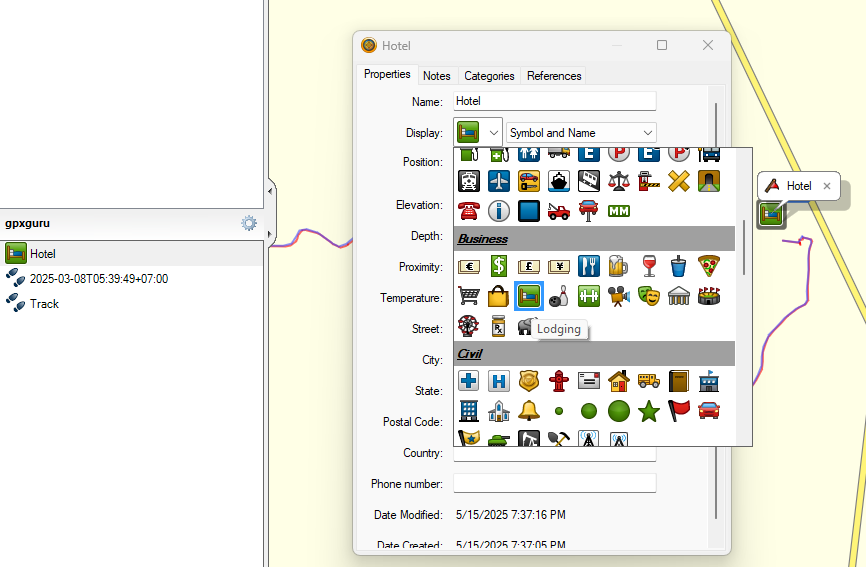
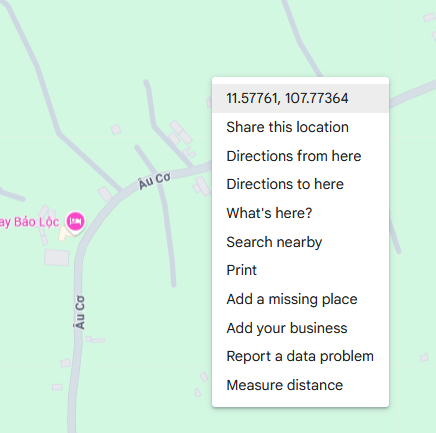
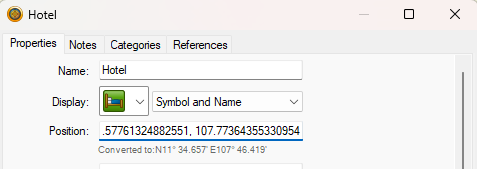
I can also adjust the location manually of my waypoint by modifying the position coordinates. For example, I want to save the Google location of my hotel that I found on Google Maps. To do this I copy the coordinates on Google Maps with a right-click at the location and confirm to copy the coordinates by left-clicking the coordinates. The information will be saved to my clipboard and I can paste it on Basecamp in the position field. A handy feature of Basecamp is the automatic conversion into the format of latitude and longitude (11.574827940751558, 107.77377229934055 becomes N11° 34.490′ E107° 46.426′). Other softwares require you to convert the format before pasting it into the software.
Draw a new track line
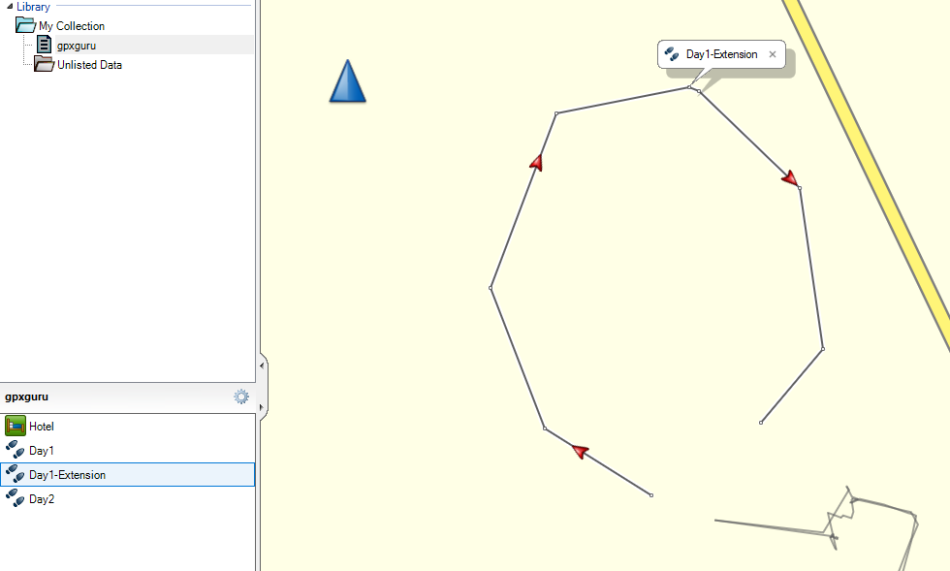
Now let’s assume we want to extend day one with some extra bits, so we decide to draw a third track extending our Day1 track. We choose the small track symbol in the toolbar and start setting track points that will connect to our new track line. We give it an appropriate name by right-clicking on the created track and choosing ‘rename’.
Combine tracks
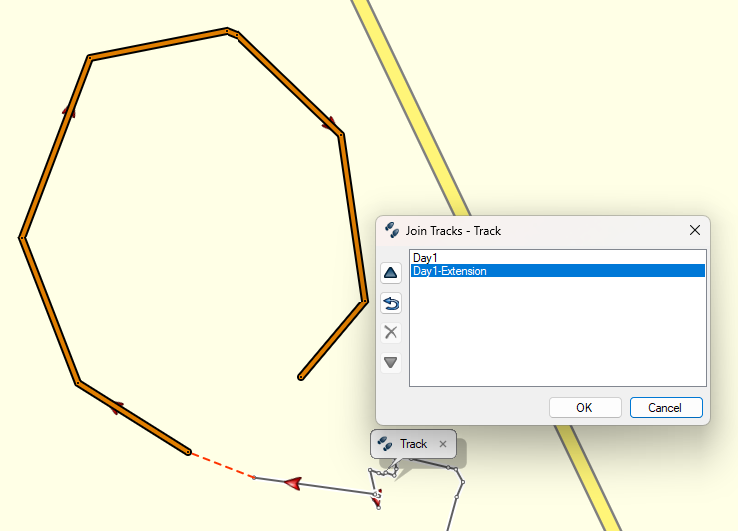
Now we want to combine our two tracks Day1 and Day1-Extension to only have one track for the first day ride. Before we do this we have to check the direction of the track. Each track has one direction that is visualized with the small arrows along the track. It is now important that both tracks show in the same direction to successfully combine them. We select both tracks on the left side panel that we want to combine and right-click to select ‘Join the selected Tracks…’
It is now also very important to choose the correct order of the tracks we want to combine. A small window will open that allows us to sort the tracks in the correct order. If we do not do this right, it will connect on the wrong side and draw a long straight line to the start of the other track. After successfully combining the tracks we can choose to either keep the original tracks or to delete them and only keep the newly merged track.
Send the tracks to your Garmin GPS device
Once you finished all the editing and are happy with the resulting track files, you can send them to the Garmin GPS device. After plugging in the device you can choose Device > Send To Device and select the list you want to send.
5 Comments