
Navigation off the road is not an easy task. It requires good preparation (See my other article on finding and mapping out trails with Google Earth), good equipment such as the Garmin eTrex or the Garmin Montana (Check out this article to see which one is the better fit for you), skill and a little bit of luck. In this short guide I go through seven tips on how you can improve your off-road navigation on your next adventure.
Related: Check out our Comprehensive Guide on Off-Road Motorcycle Navigation where we cover all topics from planning to execution.
Table of Contents
- Use the right colors
- Don’t skimp on waypoints
- Record your track
- Be precise when drawing tracks
- Always have a backup
- Use the right map
- Combine tracks as much as possible
Use the right colors
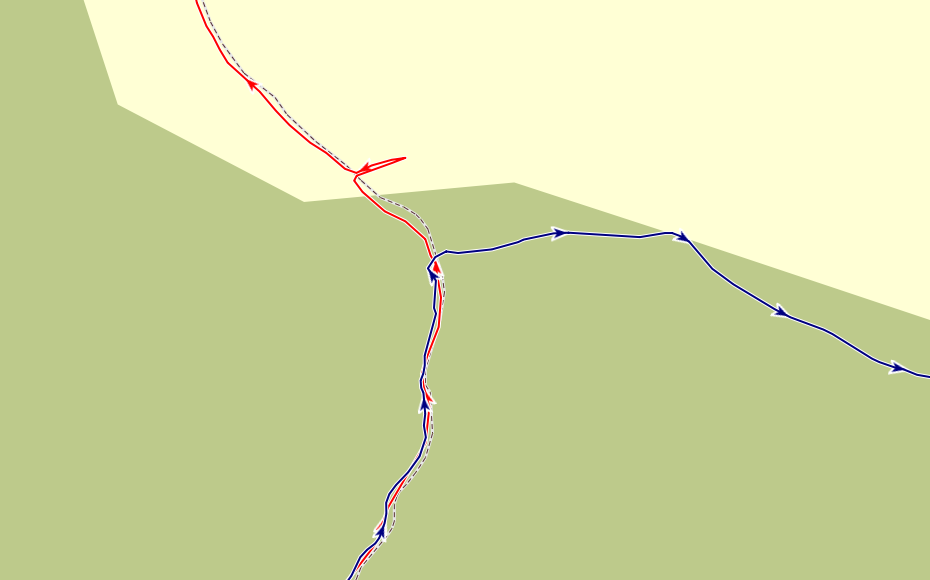
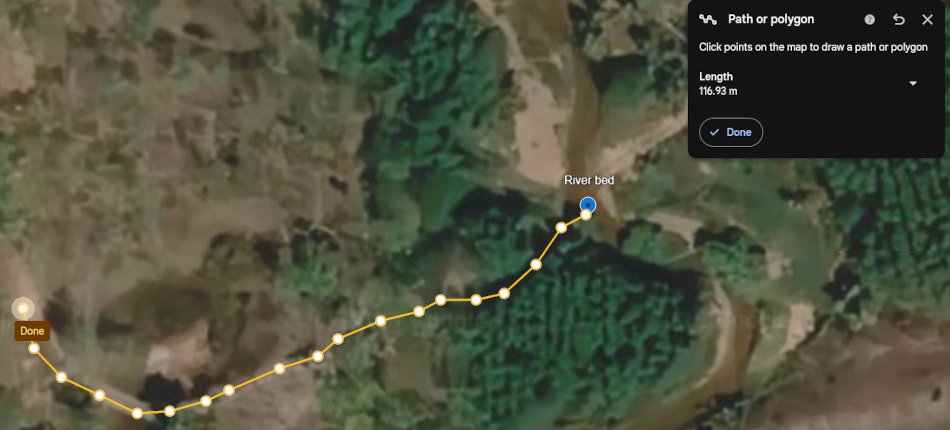
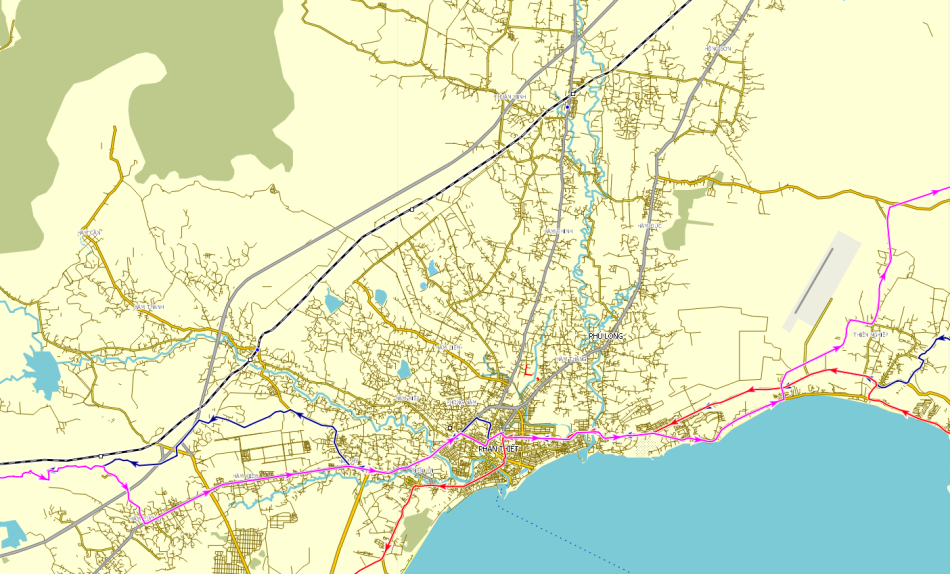
Track colors are very important for two reasons, to improve visibility of the route and to be able to distinguish between different options. That is why we always choose high contrast track colors that stand out from our chosen map. This could be dark blue, green or red, given that the map background is a light color and does not use those colors already for roads, trails or paths. Below is a great example of a dark blue formatted track that creates high contrast to the map.

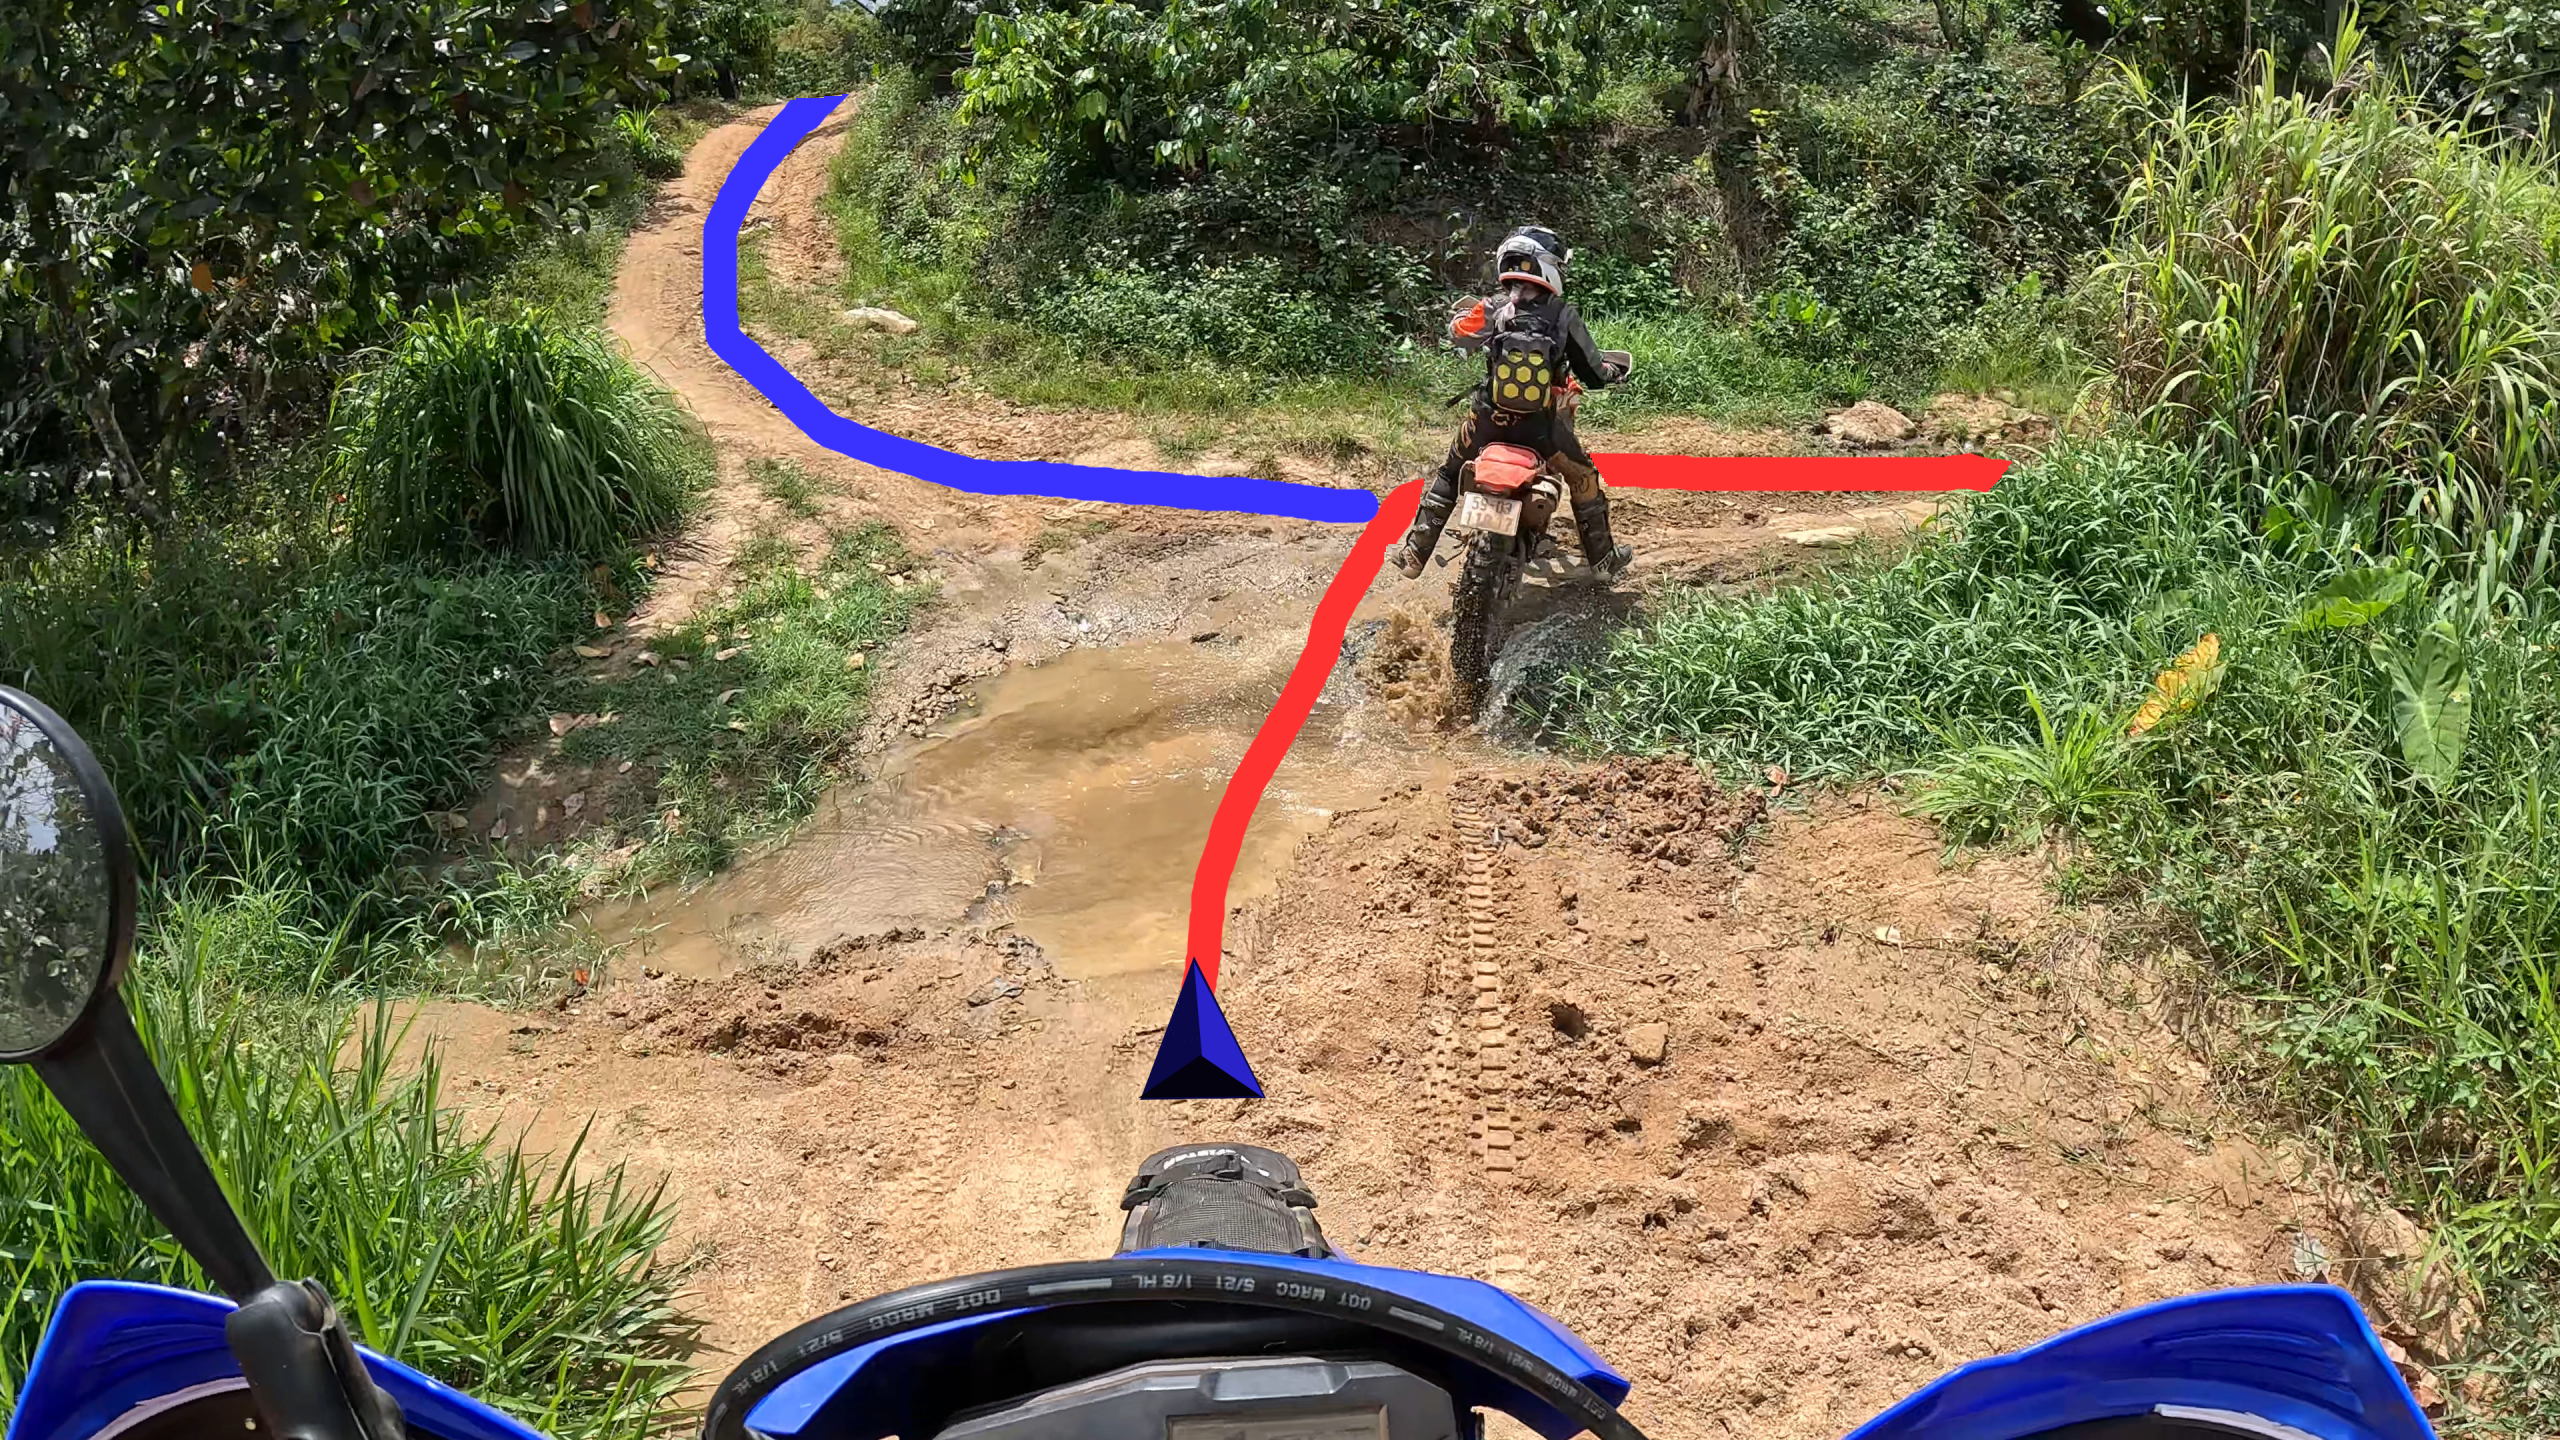
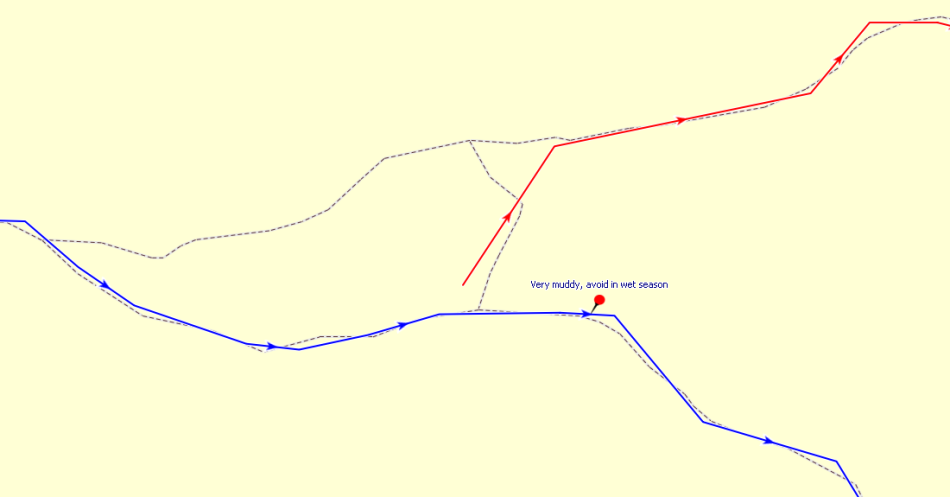
When we prepare a map, we always like to have several options in case we have to take a shortcut, or we come across an impassable trail. That is why we use different colors for different options. When you reach an T-intersection such as on the screenshot below, you want to make sure that each option uses a different color so you do not have to zoom out and check which one to take. So many times when using only a single color I wasted time on checking the map or ended up choosing the wrong way, sometimes even mistakenly heading in the direction where we came from. In the example below we formatted our main route in dark blue, and any intersection with backup options we highlighted in red color. Every time we reach an intersection we know immediately which line to follow and do not get confused.
Don’t skimp on waypoints
The strategic placement of waypoints during the preparation stage can save us some trouble later when out on the trails. We always mark major milestones on our trip, such as hotels, eating spots or difficult sections. By doing that we can easily navigate to those locations by letting Garmin calculate a route in case we run out of time and have to pick the shortest route, but it also helps during navigation by being alert about upcoming sections.
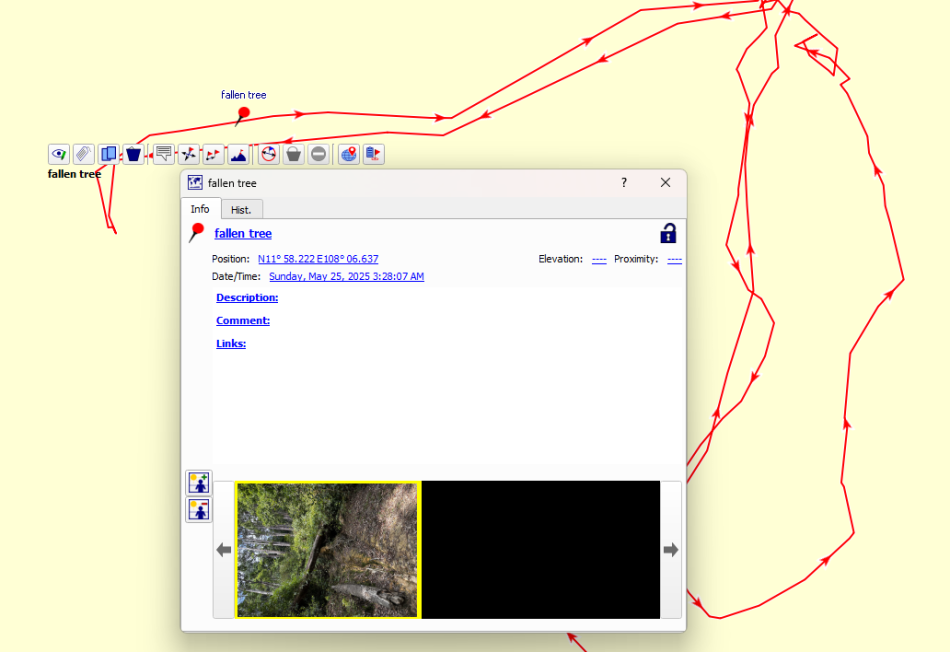
Also, we want to set new waypoints as we go for any important event we want to remind ourselves later on. Couldn’t pass a river, tree log covered the trail and couldn’t find a way over or around? Take notes for next time! If you are fancy you can even take a picture and geotag it to the location of the waypoint. That way you will easily remember for upcoming trips.
Record your track
Recording your route not only helps you to keep your track material updated but also can be a helpful tool during a trip. When having to turn around or when trying a new path, knowing where you came from can be an essential safety features, as it allows you track back to your starting point in case something unforeseen happens. For this reason I always recommend to show the recording track on the map in a different color. On a Garmin GPS that can be easily done in a few steps.
Be precise when drawing tracks
When exploring new trails, and you are using satellite imagery to draw your own track lines (as we did in this article), make sure to be as precise as possible, as this will help you find the correct path when you are out following the track. To do this zoom in on the same level as you would when riding, and setting as many track points as needed to form a smooth line. This will make navigation so much easier!
Always have a backup
Adventure riding can be full of unpredictable events or challenges. That is why we should always be prepared to stop a planned route early, find a shortcut back to the closest road or city, or have a backup trail prepared in case the first option fails. Make sure you are formatting different options in different colors as described earlier in this post.
Use the right map
One of the most important resources when navigating is the map material. It provides essential information of our surroundings, so it should be chosen wisely. We created a separate article because there is so much to talk about maps, but to keep it short the chosen map should check the following boxes: Have enough details about off-road trails and paths, use minimal storage to maximize map speed and lastly allow good visibility by having a bright low contrast color to make reading our loaded tracks easier.
Combine tracks as much as possible
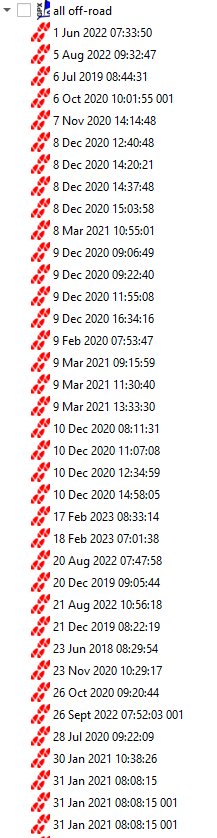
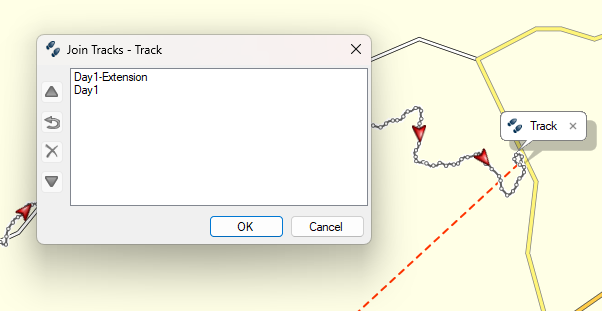
When preparing a new route we might come up with many individual sections and tracks and your track library might end up looking like mine below. To avoid having too many individual short tracks, it is always a good idea to combine as many tracks as possible into one single track. This not only makes it easier to keep an overview of the entire track but also makes loading it on our GPS device much easier. On Garmin’s track manager each track will be listed separately, so showing all tracks on the map at the same time takes some extra steps that can be avoided. To combine your tracks, use one of the many tools out there such as Garmin Basecamp, QMapShack or gpx.studio. Use our resources where we explain in details how to edit your tracks.
One Comment